Friday Faves

>> Friday, December 18, 2009

So, I've obviously had quite the unannounced hiatus from this blog...

Update on the dresser/entertainment center: I was going to try to finish it before all of the Christmas festivities begin tonight, but it's just not going to happen. But I did get 2 or 3 coats of paint on it so far and it is looking much improved. I'll finally be getting my handles over the break, so shortly after the new year I intend to slap on one more coat of paint and some poly, screw in the knobs and handles and call it done! (P.S. a foam roller is my new best friend...made the painting five thousand times faster!)

The REAL reason for today's post (when I have so many other things I should be doing right now!) is that I found a GREAT blog this week and I wanted to share. When I say great I mean "so good that I just sat there reading and clicking 'older posts' until I had read the entire blog...which dates back to May of this year."



Lots of beautiful pictures and great tips. Have a great Christmas!

Read more...

It's Primed!

>> Tuesday, December 15, 2009

On Saturday, September 19(ish), 2009, my husband and I bought an ugly dresser for $40. A couple of weeks later my sister came over with her heavy duty sanders and wood filler and helped me get it prepped for painting.

3 Months Later...

I finally primed it tonight!! Want to to know what motivated me all of a sudden? Caroline once again offered her services (and more importantly, moral support), and is coming over tomorrow to help me paint it!

Thank you, sweet sister of mine for helping me get off my bum and actually get something done. Seriously guys...my sister is Wonder Woman...she's raising 5 little ones and gets about 5 times as much stuff done as me and my 1 little monkey. Well, at least I have a good example, right? :)

Still working on getting the handles... but eventually this beast will come together (and hopefully not fall right back apart when we move next summer!)

Read more...

A little bit of fall...

>> Tuesday, October 27, 2009

I found my camera! Yeah.... It was actually put away in the desk where it was supposed to be. Guess I should have looked there yesterday!

So, just for funsies, here are a few pictures of the new fall decor I made this year!

A fall wreath for my red door:


A toilet paper pumkin
And a Halloween banner

These were all really easy, really cheap projects. And I LOVE them all.

My SIL thought I was boring for not buying the actual Halloween themed paper for the banner.... but I just love the polka dots and black damask! I inked the edges of the letters for the banner. It was touch and go there for a while, but once I did a generous enough amount I was really happy with how it turned out! Oh and P.S. I bought the chipboard banner kit pre-made at Hobby Lobby for really cheap! Always nice to have an easy start!

Happy Fall!

DIY Day @ ASPTL

Read more...

Hangups

>> Monday, October 26, 2009

Baahhh... Don't you hate those unexpected little hangups {that pile on top of your laziness to make a slow-going project come to a screeching halt}?

Here's mine. I ordered new hardware from an Ebay store a couple of weeks ago for the dresser/entertainment center and have been waiting for it to come in. Then yesterday my husband just happens to look up the order information on Ebay, and sees that it's being shipped to our old address. IN UTAH. Are you kidding me? I'm sure it was an error on my part, but I swear I remember changing the address from the default (our old one) to our current address. Maybe I imagined it. So now I've got to get that figured out. Sigh.

I was also planning on posting a fall/Halloween decor post today, and linking it up to the DIY Show-off's fall party...but alas, our camera is missing. Bah.

Do you have any glitches in your current (or not current) projects? Please commiserate, I mean leave a comment, so that I can quit feeling like a dummy.

Read more...

Cute diaper pouch tutorial and GIVEAWAY!

>> Friday, October 23, 2009

Want to win this cute diaper and wipes pouch?? Go check out the giveaway at the Crafty Clique!

And in case you don't win it, Lyssa was kind enough to give us a tutorial as well, so you can make your own!

Read more...

Friday Faves

>> Thursday, October 22, 2009

Last night I had fun checking out all of the successfully finished projects from The Inspired Room's latest Procrastinator Party.


Here are a few of "Afters" that I really enjoyed:

Read more...

LAZY BUM!

That's me....

I wish I had a clean house or some terrific finished projects to show for my neglect of this blog... but no. My dresser-turned-entertainment -center is still yet to be primed and painted.

I know, "What do you DO all day??"

I have no idea. Make meals. Eat them. Play with the baby. Watch HGTV. That about sums it up. I could probably be a thousand times more productive than I am, but I've been lacking motivation lately. Do you ever get like that?

What do YOU do to get back in the groove when you've lost your motivation to get things done?

Read more...

Friday Faves

>> Thursday, October 8, 2009

I've been working on a project for one of my friends using my digital scrapbooking program. I needed a particular sort of embellishment (and I'm too cheap to pay for that sort of thing...), so my wonderful sister sent me a link to a blog called Digifree.


Um.....yeah, you basically just have to check this site out to believe me. There are a RIDICULOUS amount of free digital scrapbooking downloads listed EVERDAY! Like seriously hundreds of items a day. I didn't read up on all the details, but it looks like they have scrap designers let them know when they have freebies, and pass them along to all of us. There's a range of items, from a single embellishment to entire (even really large sometimes) kits. And of course the level of cuteness varies as well, but for the most part it's really cute stuff!

If you ever do any scrapbooking, cardmaking, invitations, blog design, etc. digitally it is SO worth checking out. (I'm pretty sure it's all personal use only, so keep that in mind...)

HAPPY SCRAPPING!

**If you have a blog you would like me to check out and feature as one of my faves, send me an email!

Read more...

Friday Faves

>> Thursday, October 1, 2009

I wanted to find a cute and easy (and cheap) fall decor craft idea yesterday, and I found a couple that I like.
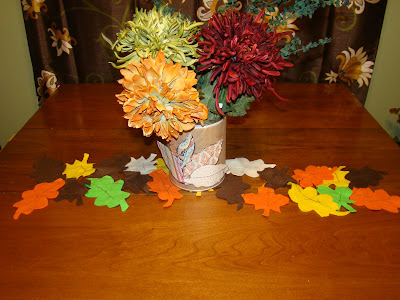
This cute felt leaf table runner is from Fireflies and Jellybeans.


I also really liked using that same idea to create a felt leaf garland! I found this one at whipup.net.


How cute and fall-like are these dried bean balls?? I love all of the different colors! I found them on the Better Homes & Gardens website, in the the craft section, I think...

Another thing I did to celebrate the first day of October yesterday was buy a package of 6 pairs of cute orange socks! Different patterns and solids. They were on clearance for $3! I was going to get the yellow pack because I figured they would match more of my clothes...but I decided to be festive instead! Now if only it will cool down enough for me to want to wear a shoe other than a sandal... Have an awesome weekend!

Read more...

Birthday whatnots

>> Wednesday, September 30, 2009

We had a big weekend. Bitty's first birthday was on Saturday and we had a big little family party. Then my husband's birthday was Sunday.

Just look at this adorable kid. I think he had a great time!

We celebrated with lions...


tigers...


and monkeys...
Oh my! So, for Christmas last year my brother-in-law gave me the book Hello Cupcake! It's a good one. I had been planning on making cupcakes for Bitty's birthday for a while, and was just going back and forth on which ones to make...when, as my luck would have it, my book disappeared off of the face of the earth. Yeahhhh....

So luckily I was able to find a picture of the monkeys online. The lions I tried to remember as well as I could, and the tigers were something I just made up (hmmm...can ya tell?!). My mom was in town for the birthday party and she helped with the cupcakes, since I was running out of time to get everything done before the party started. Thanks mom!

The other big project I had been planning on before the birthday weekend (my husband's birthday was Sunday) was a homemade birthday banner.

I LOVE birthdays, and growing up we always had one of those paper Happy Birthday signs as well as some plastic pennant birthday banners that we would decorate the house with on everyone's birthdays. And at some point a few months ago I just got it in my mind that I was going to make a birthday banner out of fabric. I had see cute fabric banners all over the blogging world and thought this would be the perfect idea!

I finished it around 11pm on Friday, just in time for the big weekend! I LOVE how it turned out! I should have taken more pictures to post, but for now here's what it looked like:


Do you love it as much as I do??? I would really love to hear what you think about it... I've been toying with the idea of opening an Etsy shop for a while, but I can't decide if it would be worth the trouble... But this ended up so dang cute that I thought maybe someone would want to buy one if I sold them, right? I'll take some close-ups later and post them so you can see just how cute it really is!

DIY Day @ ASPTL

Read more...

Monday, Monday...

>> Monday, September 28, 2009

I have some fun stuff that I was going to post about today.... Our birthday weekend and whatnot, but I was too busy leaving comments to enter myself on all the giveaway posts at Nesting Place today! Check it out!


Don't worry, I've also been cleaning my house and playing with the bitty boy. Not JUST entering giveaways.. :)

Read more...

Girls' night treats

>> Wednesday, September 23, 2009

About a week and a half ago, my BFF Jackie came to visit. While I was grocery shopping before she came I happened to walk past the cake mixes and realize I didn't even have any treats for her visit, and you can't have a weekend with your best girl friend visiting without treats! That would just be insanity.

So I solved that problem!

I picked up some of this:

And a can of this:

And made one of the best treats EVER! Just take a look at these little goodies!


And they taste much better than they look! Cakemix cookies are quite versatile, but this is my favorite way to eat them. Funfetti cake with rainbow chip frosting sandwiched in between...YUM! I learned how to make cakemix cookies from my college roommates (Jackie was one of them, so what an appropriate treat for her visit!). The ones my roommates made most often were chocolate cake with peanut butter chips in the dough. The possibilities are endless, I'm sure.

The other reason these were a great treat is the fact that they are not very labor intensive. Here's the recipe.

1 package of cakemix of your choice
1/3 cup oil
3 eggs
other ingredients or toppings of your choice

Shape dough in to 1 inch balls, faltten into 1/4" thickness (I don't think we even did that step...). Bake at 375 degrees for 8-10 minutes.

And that's it. Easy Peasy.

We also made a late night Sonic run when my brain had gotten too fuzzy to sew a straight line anymore.

{Have you seen that one Sonic commercial with the two ladies making a late night Sonic run? OH man, I laughed so hard thinking about it, and how we are those women...I can't remember it exactly but it's something to the effect of "We're two crazy ladies on a late night Sonic run...You never know what we're going to do next! Maybe go....buy some eggs....and boil 'em...." haha... If you've never seen it, I'm sure it sounds lame, but I think it's so funny!}

And we ordered something that may or may not have been a good idea. We each got one of these in the strawberry limeade variety:


Freaking delicious! The reason I say it might not have been a good idea to order it, is that I have SERIOUSLY been craving one every day since then. And at about $2.50 a pop I can't really just go get one any time I want. That being said, I'm not sure how much longer I can last without getting another one! Maybe I'll have to take my hubby out for treats at Sonic for part of celebrating his birthday this weekend :)

P.S. There was absolutely NO signage for these babies at the Sonic we went to. If you go to order one and don't see it on the menu, go ahead and ask if they have it. Luckily Jackie had had one before so we ordered them even though they weren't printed on the menu.

What treats do you like to have on a girls' night??

Read more...

I might be crazy....

>> Tuesday, September 22, 2009


{Edited to add: I'm submitting this project as my Procrastinator Party entry at the Inspired Room. I know I posted this originally before the party...but in true procrastinator style, the project has hardly been touched since the original post date.. And the icing on the cake is that even procrastinated linking my post up. OOPS!}

Here's the story. We moved into our apartment on July 29th. We didn't bring our old entertainment center with us, because, well, it was an ugly piece of junk. We gave it back to the thrift store where it came from. Ever since then, this has been our entertainment center.

Yes. That is a {thrift store} dining room chair. With our tv on top, and video games (ah, husbands...) and a jumble of cords underneath. Pretty gangster, right? I haven't been able to find anything we wanted for an entertainment center within our budget yet. First I was looking at armiores, but my husband wasn't loving that idea... And unless we shelled out the money for one with the doors that slide back or wrap around they'd be hanging open all the time. Really. I used to complain about how much tv my husband watches, but now that we have TLC and HGTV, I'm almost just as bad. Almost.

So, I got to thinking maybe we should make a cabinet with 3 or 4 doors where we can keep everything out of sight, except for the tv. Because we SO need some storage for games and movies, etc. Just look at this. UGLY!


The problem with that idea is we don't really know how to make things. And we don't want to spend a ton of money, effort, and time on something that's going to look like we made it. (And I don't mean that in a good way!)

So, for a Saturday afternoon activity, we browsed the Salvation Army on the hunt for something that would work. I had thought of a dresser as a possibility before... Something that could be versatile, that we could use somewhere else as a buffet or an actual dresser in the future if we wanted.

We found something that we have since referred to as "a diamond in the very, very rough."

Allow me to introduce you to The Beast.And here's a closeup:


Aren't those the ugliest handles you have ever seen in your ENTIRE life? Not to mention the weirdest. It really is a beast. It weighs a TON and is going to take A LOT of work, but I'm hoping to end up with one of those beautiful wow! transformations, instead of failing miserably. Because that is a distinct possibility at this point. It could go either way.

But it was on sale 50% off. So for $40 we got it. We're just not at the point in our lives where we can go buy an expensive piece of furniture, ya know? I'm imagining beadboard to cover the damage on the sides, but I don't know if I'm that good! This is uncharted territory people! Wish me luck!

Read more...

Friday Faves

>> Friday, September 18, 2009

Okay, I didn't mean to totally ignore the blog this week, but on the up side, I did get some things done that I needed to!


My sister told me about a blog called Our Best Bites recently and said she had tried a few of their recipes and liked them. So, when I was doing my meal planning a week or so ago I decided to check it out and work a few recipes into my plan.

I tried the guiltless alfredo sauce, the black bean soup, and the breakfast crescent braid. YUM!


There wasn't a picture of the finished alfredo sauce, but there are the ingredients. Pretty easy, and delicious! I thought it turned out a little salty though, so next time I would probably half the amount of salt. But I will definitely make it again! If you've ever reheated Olive Garden alfredo and seen the amount of butter all that cream was floating in, you will definitely appreciate that fact that this is "guiltless". SO YUMMY!


Black Bean Soup. I like this too! It was pretty easy to make, which is always a plus. I was kind of worried that I wouldn't like it, but I really did! We ate it by itself, but I think next time I make it, I'll serve it with quesadillas or taquitos. I know they've got a recipe for homemade taquitos on the blog, so I may have to check that out!


This one's called Easy Breakfast Crescent Braid. It was super easy and pretty yummy. We were thinking it would be tasty to add some bell pepper and mushrooms to the egg next time, or maybe try sausage or ham instead of bacon, though the bacon was delicious. You could get really creative with this. The only thing I would warn you on this is that it doesn't make a whole lot. My husband, my (almost) 1-year-old, and I ate the whole thing. So make two if you have more mouths to feed!

This site is definitely my favorite this week! You should really go check it out. Not only are the recipes tasty, the site's got such a fun, colorful design and awesome pictures (including the ones on this post!).

Read more...

Still finding a balance...

>> Monday, September 14, 2009

Last week I was good and wrote a blog post everyday as well as getting some projects done and other projects started. Awesome, right? It would be if I had done the other important things I should be doing in my life, like my church responsibilities, etc.

I've been realizing lately that I don't really feel like much of an adult. This hasn't been much of a problem in the past, but ya know... while I am young, I just keep getting older, and I don't want to be one of those really immature 25-, 30-, or 40-year-olds. I just don't.

So my goal is to be more of an adult, and what this translates to for me is being more responsible. I wouldn't say I'm irresponsible, but I let myself off the hook for not doing things I should too often by using excuses.... I had to get those projects done, I really wanted to get that blog post done today, or even something as lame as I hate calling people I don't know!

I'm going to try to start being better about focusing on the important things and doing what I'm supposed to do when I'm supposed to do it, dang it!

I'm writing this to say sorry if my posting is a little sporadic. I'm busy trying to buck up and be an adult!

Read more...

Friday Faves (I was featured!!)

>> Friday, September 11, 2009

So, I felt kind of under the weather all day yesterday, and then really started to feel crummy and feverish last night (so I ended up laying in bed reading Pride and Prejudice and watching HGTV instead of painting my table, darn.)

And this morning I woke up with a huge headache, and of course, somehow with the move we ended up with no tyleonol in the house! Luckily I have a wonderful husband who went and picked some up for me before going to work. That sweet man, I love him. He even brought it to me in bed with a glass of water. So that made me feel a little bit better.

Then I came downstairs and checked my email, and saw that I had a comment on my cornice board post saying I was featured on Someday Crafts!! How awesome is that?! This is my first feature and I'm very proudly displaying my button there on the right sidebar! And right here.

Someday Crafts?

I'm actually new to this blog, and it is awesome! I haven't had a chance too look through too many of the posts yet, but I love this one all about pumpkin fall decor! I think I'm gong to have to pull out my fall stuff next week (even though it's still almost 100 degrees here!) Go check out this blog, it's my Friday Fave today!

Read more...

Dining room curtain sneak peek!

>> Wednesday, September 9, 2009

I finished the curtains for the sliding door in the dining room, and I know you're all just dying to see what they look like. Or you can humor me and pretend like you are at least!

I bought a pair of khaki chino curtains at Walmart for $16, and they were a little small, so I worked up a plan to add on to them. I won't show you the WHOLE picture, until I do the entire dining room reveal (hopefully in a week), but here's a little peek to whet your appetite!


P.S. You have no idea how hard it was to find black grosgrain ribbon for this project. Seriously. I went to 4 different stores, and ended up with black twill tape instead. I am pleased with the result, but seriously? I don't live in a small town, you'd think they'd have that kind of basic crafting supply in stock. I guess it's just too popular, kind of like me (JUST KIDDING!).

And if you made it this far without giving up, I'm going to share another story with you. So, Hobby Lobby was stop #2 on the search for ribbon. I love this store, and it's just down the street from my house! {When we moved to our new apartment, I told my husband I was going to be fine, because I knew how to get to Walmart and Hobby Lobby.}

Anyway, turns out they only have black grosgrain ribbon for sale by the yard, and not by the spool. Let's do some math. I needed about 7 yards. It sells for $0.83/yard. I just "guesstimated" that would put me somewhere in the vicinity of $6-ish dollars. Maybe $5 (okay, you caught me, we're not really doing math!). Anywho, the grosgrain ribbon by the spool is 7 yards and normally sells for $4, but was on sale for $2 a spool.

I thought they might just have run out of black by the spool, but I asked the fabric lady and she said since they sell it by the yard they don't sell it by the spool. Yeeeeeaaah....so, I'm supposed to pay 3 times as much for it because you can't give me an entire spool to take home? I'm not sure if I was feeling cheap, cheated, or if my pride was wounded, but I told the lady I'd just have to buy it somewhere else. (I never say things like that to sales people!)

Well, a lot of good that did me. Two stores later I was leaving with 5/8" twill tape instead of 7/8" grosgrain. But like I said, I still think it looks good, and may have even been easier to work with, so it all turned out just fine.

But really, when did it become so hard to find black ribbon??


Oh, and just for funsies, another sneak peek:


That's right, I sanded the table last night, and will be priming it during Bitty's naps today!

Read more...

My table, Alt-erior Design-ed.

>> Tuesday, September 8, 2009

Don't you sometimes wish that you could just SEE what that new paint color would look like before you actually take the plunge (and spend the money)?

Well, I know a great girl, Ali Mae, with a great blog. It's called Alt-erior Design, and she does virtual design consultations. What she does is takes a picture that you give her, and works her magic on it to show you all of the possibilities! And she does more than just paint colors. She rearranges furniture, adds accessories, etc, so you can get a vision of what your space could look like.

And I'm super impressed (and a little jealous!) that she has found such a great way to make a little extra cash as a stay at home mom to three adorable little ones.

Like I said, she's a great girl, so after she read my post asking for advice on how to paint the dining room table, she decided to help me out and show me what the options I was considering would look like. She even threw in another option I hadn't even thought of.

Here's my before:


And here's her awesome alt-erior design (click to see it larger):


How cool is that?! Go check out Ali Mae's work at Alt-erior Design! And you'll just have to wait and see which option I decided to with! Thanks Ali Mae!

{And I know, the before is terrible, with the food and dishes all still out on the table and that ugly plastic shelf. I considered taking a new before shot for this post with all of that put away now, but I decided I'd wait and show the dining room off when I finish with the table and the curtains. It's going to be quite the improvement.}

Read more...

My to-do list

>> Monday, September 7, 2009

I had a lovely Labor Day, how about you? We had fun time on a picnic at a park with my brother and his family, but I also managed to get a few things done. I cleaned out the fridge, and with the help of my handsome husband we finally arranged the laundry room, and hung up my cute little black thrift store shelves in the dining room. Love it!

Here's what I still need to do this week (before FRIDAY!!):


finish curtains
{the ones covering the sliding door are a little small, so I'm adding some a little something to make them larger... I'm pausing from that project to write this post, but I still need to go get some ribbon to finish them up!}

tie-backs {out of matching cornice board material, to go on the LR curtains}

shelf curtain {to cover the plastic shelf by the fridge}

finish unpacking stuff on the landing

finish scrubbing outsides of kitchen cabs

fix loveseat {a couple of places came un-stapled during the move}

tidy bedroom

paint table(s) {dining room table!! I also have plans for coffee and end tables, if I get to them}

make a shower curtain for baby's bathroom

buy rug for baby's bathroom


What projects do you need to get done this week?

Read more...

My {kind of} bold cornice board...

>> Sunday, September 6, 2009

...or "corny board", as my husband affectionately calls it. He thinks decorating terms are silly. When I said something about spray painting finials, he stopped what he was doing and said, "Finials? Really? Are you just making these words up??" Oh, I love him!

Anyway, back to the point...

Remember when I finished my high chair seat re-do and showed you this picture of my cute boy in front of our vertical blinds in all of their glory. Did I tell you I HATE the look of vertical blinds?


As soon as we moved in I knew I wanted to hide them. I know I could have just taken them down altogether, but I didn't want the hassle of taking them down, storing them somewhere, and putting them back up when we'll be in this apartment for less than a year.

Also the side of the apartment with the blinds gets a LOT of sun and heat in the late-ish afternoon, so I kinda wanted to keep them as insulation from the hot hot sun. (FYI our power bill this month was about $140 more than we used to pay in our old place...what a difference 500 more sq. feet and central air makes in the price...)

So I decided I wanted to keep the blinds up, but HIDE them... So we put up curtains (which ended up being a little small...I'll fix that this week..didn't get done this weekend, oops!) and cut a board (I started with a 1x8x8) for a cornice board. My husband helped me screw it together. This is what our sliding door looked like for a while:


So, the other night I finally got around to covering the cornice board. I did it at about 10:30pm, so I hope I didn't bother the neighbors too much! Sorry Ashley!

First: Lay out your fabric, batting, and board, like a nice soon-to-be-cute little sandwich.


Next: Staple the fabric onto your board. I started in the middle and worked my way out. Apparently it also helps to leave the newspaper you had the last two boxes of kitchen stuff wrapped in on the floor if you're taking pictures. (But hooray! I finally finished unpacking the kitchen last week!)

Tip: On the ends (the little short boards screwed in to the long one) don't wrap the fabric all the way around. Stop on the 1" part that will be flush with the wall, so that you have a place to screw the brackets on to the inside. I wrapped mine all the way around and realized I needed to take it out and fix it. Live and learn.


Then: Hold the board while your cute hubby screws the L brackets onto the short pieces for you.


I know this next picture is kinda blurry, and there's a lot going on with the vert blinds hardware and curtain hardware AND the cornice board, so look closely. We connected one side of the L bracket to the short side of the cornice board and the other flush with the wall.


And Ta-Da! Tell me what you think!

It's not perfect, I know... but I think it's a heck of an improvement.

I picked a bolder fabric than anything else we have in our house, because I just didn't feel like sticking with the expected, or boring, but branching out a bit. I'll be making tie backs for the living room curtains (which we DID finish hanging this week, I'll post a picture when the tie backs are done). I'm hoping that'll tie the two rooms together a little better.

After getting the board hung up it made me so excited that I went and bought the paint for my dining room table. You'll just have to wait to see what it'll look like!

I'm hoping to get a lot of little things done this week, since my BFF is coming to stay for the weekend. Nothing like house guests to get you going!

Update: The curtains are finished! If you want a sneak peek, click here!

I'm linking this post up to the following:


DIY Day @ ASPTL

Read more...

  © Blogger template Simple n' Sweet by Ourblogtemplates.com 2009

Back to TOP