Free CUTE patterns!

>> Tuesday, December 21, 2010

It's Caroline, I'm hijacking Elizabeth's blog again to spread the word about Home Spun Threads. Right now she is offering super cute patterns to download from her shop for (my favorite price) FREE! Check it out now, it won't last forever!

Read more...

Halloween Preview!

>> Friday, October 29, 2010

Okay, I apologize for the poor quality of the picture (sent it to my email from my phone!) and the rushed manner of this post, but I just wanted to take a minute (literally) and post about the homemade Woody costume I made for my 2-year-old boy this year!

It was touch and go there for a bit, but I think it came together so cute! I can't wait for him to put it on this afternoon for our first of 3 Halloween parties we'll be going to today and tomorrow! What do you think?

The sheriff badge, belt buckle, holster and boots are all made from craft foam (either hot glued or stapled together...let's hope it all lasts till tomorrow!). For the boots I just made two cylinders and cut the V shape int he front. He'll wear his brown tennis shoes, and just slip the "boots" over his pants. I made the vest out of white fabric I painted cow spots onto. The shirt I made by painting the plaid and buttons on with some of that fabric paint with the skinny tip.

My husband and I are going to be Slinky Dog! Still throwing that one together though! I'll try and post a picture of that tomorrow.

I'm linking this post up to Fun on A Dime's October Fun Challenge!

Read more...

What's your poison?

>> Monday, October 18, 2010

Lately I feel like I need to wear a gas mask when I clean the bathrooms. Because, ironically, the bathroom is about a million times smellier while I'm cleaning it than it is between cleanings. It's not the smell that's really bothering me, I guess, it's the fact that I'm sure something that something that smelly can't really be very good to be around...

So, I want to know, what do you use to clean your bathrooms?

I currently have a handy tote full of cleansers and sprays that I take from one bathroom to the next on bathroom cleaning day... Right now it's got some Fantasik bathroom spray, Lysol toilet bowl cleaner, Clorox wipes, store brand blue glass cleaner, and a bottle of The Works tub and shower spray (which I just used for the first time--not only was I worried my nose hairs were being singed by the chemical smell of it, but it didn't seem to make my shower look a bit cleaner).

I don't mind the wipes, bowl cleaner and glass cleaner so much, but I want to find a better solution for the tub and counter/sink that will get the job done without poisoning me in the process.

I've thought of trying the homemade route, but I always worry I'll go to all that work for something that either doesn't make my bathroom look clean, or doesn't actually get it clean (disinfecting all the dirt, grime, and bodily whatnots that happen in a bathroom...). Any thoughts on this?

I've thought about (but not yet seriously considered) something like the Shaklee cleaning system that professes to be both economical and safe to use. Has anyone tried this?

So, please leave a comment, tell me what you use, what you like, love (or dislike for that matter), and any other tidbit that might help me decide how to clean my bathroom without having to invest in one of these:

Read more...

Guest Blogging: Fun On A Dime

>> Tuesday, September 21, 2010

Today I'm blog swapping with Michelle from Fun On A Dime! She has a great blog with lots of fantastic ideas for inexpensive family fun! She was kind enough to share one of her fun projects on my blog today! Thanks, Michelle!

Hi my name is Michelle (aka the Fun On A Dime Lady) from Fun On A Dime. If you are looking for some inexpensive fun for the whole family, you should come over and check out the fun we are having. There are a lot of yummy recipes, crafts, games, and many more fun ideas to keep you and your entire family busy. Come join the fun!

Now onto the fun!

We made these while we were discussing hands and feet, but I think they would make a great present for any mom, dad, or grandparent or great as a keepsake! Super easy to make and the kids had fun decorating them after they dried.


What You Need:

  • 2 c. flour

  • 1/2 c. salt

  • 3/4 c. warm water

  • Large bowl

  • Mixing spoon

  • Baking Sheet

  • Rolling pin or solid cup (I prefer the cup to the rolling pin)

  • Food coloring (optional)


**makes enough for one foot and hand print together or two separate hand/footprints

Directions:
Step 1: Mix ingredients together in a bowl. If the dough is a little dry add water a little at a time. **optional** Mix in food coloring to color the dough.

Step 2: Make a ball of dough, then flatten it to about a one-inch thickness in the shape of a circle. I recommend sticking to the 1 inch thickness. I tried to do less than an inch thick and once the hand/foot prints were finished, it was very thin on the bottom.

Step 3: Place the dough on a baking sheet, if you have not already. Put the baking sheet on a hard surface like a tile floor or pavement. Press the hand and/or foot into the dough to make an imprint. I pressed on every toe and finger and made sure their palm/heel got a good push into the dough.


Step 4: If you want to add a name or a date, the easiest way is to use a toothpick and poke words/date in with many little dots. I tried a few different ways (knifes and dragging the toothpick) and it just kept tearing the dough. (see below picture)


Step 5: Bake at 325 degrees in the oven until hard or let it air dry a couple of days. Once baked, it comes off the pan easily. I recommend baking. I baked one of them right away and let the other two air dry. The one I left in the oven I finally took it out after 30 min and let air dry the rest of the way (it probably could have baked another 10-15 min). The other two started to color oddly and stick to the pan while air drying after a couple of days, so I threw them in the oven for 20 minutes to bake. They get brown underneath but not on top and they didn't stick to the pan once baked.


This is what it looked like after it was finished baking


Step 6: Paint and decorate as you like. I like to let them paint with cue tips, then I do not have to worry about them damaging the few brushes we have while they are painting on this hard surface.


Step 7: Get excited about what you were able to create! **Warning** Mold will break when tossed! After this picture was taken, my son was so excited that he tossed his mold onto the table without thinking about it and it cracked. = ( He now knows to be careful!


Enjoy!

Read more...

Frozen Fruit-sicles

>> Monday, September 6, 2010

A few months ago I bought a set of popsicle molds from the Target dollar spot thinking it would be a fun activity/treat for my little boy. Then of course I pretty much forgot about them, and never used them until I saw this challenge at Fun on a Dime.

So a couple of weeks ago we broke out the molds, our blender, and some fresh fruit and milk. I believe our concoction consisted of some milk, a banana and a half (you can see my little boy eating the other half, below!), a peach or two, and what little we managed to get out of a mango that we had a hard time cutting open. We are inexperienced in the mango department. Just look at the look on my husband's face... I'm pretty sure he was saying, "What am I supposed to do with this?"


We poured our smoothie mixture into the molds, and put them in the freezer to enjoy the next day.


We ran a little water on the outside of the molds to loosen the popsicles up enough to get them out, and enjoyed! I kind of like this next picture. Not so much the up-the-nose shot of me (I used to be notorious for that one), but the fact that my little boy seems to be lovingly looking at me and thinking, "My mom is so cool!".

I'll tell you what these popsicles are really useful for. The post-nap, pre-dinner snack. Works out great... He thinks he is getting a treat, while I know he's really having something healthy. And everyone's happy!

Read more...

Life vs. Blogging

>> Friday, September 3, 2010

Life always wins, when it comes to that one. That's my excuse for not blogging much. I had big plans of posting everyday and whatnot, but I just haven't felt like it.

I've been trying to adjust to living in a new place with a husband who is at school until after dinner time everyday and an almost-2 year old, who is totally acting his age. As I type this, I just realized that this is the first time in my my life I've lived somewhere without someone in my family or my husband's family living in the same city. No wonder it's an adjustment!

I've been getting things done slower than a snail's pace lately, at least that's what it feels like (every time I look at all the walls I haven't finished painting). I blame that one on at least partially on being pregnant... I've been so tired lately! Everyday by the time we put the little boy in bed (and often during his naptimes) I feel SO exhausted that all I can think about doing is lying down. And I thought the 2nd trimester is when you're supposed to have more energy! I'm afraid to think what I might feel like in the 3rd trimester.

Anyway, I did upload pictures from my camera today, so hopefully I'll be able to put together a few quick posts in the next little while!

And, because it's sort of lame to have a post without any pictures (and since I guess this is the first post on this blog where I mentioned my pregnancy--it's a boy, by the way!) I'll leave you with this lovely shot of me. This was last Sunday at 19 weeks, in my ugly master bathroom.

Have a good weekend!

Read more...

Color Conundrum

>> Tuesday, August 17, 2010


My cute husband and I began discussing paint colors and such for this new house before we moved in. We even picked up a bunch of paint chips at a home improvement store while we were scouting out fun things like new fridges and washers and dryers.

Right away, we noticed a difference of opinions when it came to paint colors. I was all over the "tan is neutral, and you can add color with accessories" argument, while my husband (who by the way, on multiple occasions has told me that brown is not a color, silly boy) said tan is boring, and why don't we paint the walls colors like blue, green and red?

I tried to tell him that the main reason was to avoid having our house look like the inside of a circus tent (or something to that effect--probably more like "we don't want it to look like crazy people live here") etc, etc.

Anyway, we ended up choosing to paint the living room and adjoining family room/dining area a couple of nice neutral tans. Just like I wanted, and still what I think is the best choice for these areas. So I moved on and started thinking about what to do with our bedroom. And all I could think of was TAN. Same for our master bathroom. And even I started to think that that would just be too much tan!

Anyway, it got me wondering, was I choosing tan because I really thought it was a great design choice (ya know, since I know so much about that and all...) or if it was just because I was afraid of choosing the wrong colors. Yes, friends, it turns out that the reason I was afraid painting colors other than tan is that, though I have seen lots of design shows and blogs, I don't really know what I'm doing (and chances are good that it would look like a circus in here).

And if you're still reading what has turned into a long boring post about nothing of consequence, I will tell you, I still feel that tan is a wise color choice, but maybe not in every room of the house. So we'll be painting mostly tan in the main living spaces with a little green, blue/aqua, and maybe yellow and grey (the last two being kids' rooms) thrown into the mix.

Whether or not it ends up looking a little too circus-y is yet to be seen. I hope not.

What's your opinion on using color on your walls? Would you play it safe with tan or add some punch with color?

Read more...

I'm Alive! (In case you were worried...)

Well, we survived the move. It was actually a little over a month ago, now, but I'm sure glad it's over. I'm not gonna lie, I had a little meltdown when I was stranded at the gas station with a dead car battery and neither my husband or father-in-law (who was driving our other car--thank you!) answered their phones. I think they were talking to each other... It all turned out fine, thanks to some friendly strangers, and of course my great FIL who came back and took care of it all while I entertained my little boy. Anyway, after that it was smooth sailing!

We got here, unpacked the essentials and went on vacation!


And now while my husband is at school, I am busy taking care of this crazy kid, and working on putting our house together. It's been going super slow so far. Remember this present from my husband?

Yeah, that's the only thing hanging on the walls of our house. Not a single other thing is up. I had a bit of a hard time figuring out what to do at first, as far as decorating goes (more on that later). But I think I've got it just about all figured out now, so it's on to the hard part...ya know, actually doing it. For now I am focusing on this room:


I hope I can get some of my readers back and interested in seeing the rest of the house, it's little makeover, some more recipes, and other little tidbits that I hope to post in the near future! I've even got a great guest blogger lined up next month that I'm super excited about, and you should be too!

Thanks for reading!

Read more...

Another Makeover and a Friday Fave

>> Friday, May 21, 2010

Ta Da!

Do you love my blog's new look?? I do. I love the bright colors so much! I wasn't going to make it over just yet, but I started playing around with the design, just for fun, and loved it so much I had to go ahead and do it!
There are still a few things I want to change, though. I want to figure out how to make that header a little less "large and in charge".... just shrink it down a bit so it doesn't fill your whole computer screen! And the sidebars need work, but I guess I'll get around to that later. When I figure out how.

But mostly, I love it! It is cheerful, which is exactly what I wanted.
I got the cute digital scrapbooking kit FREE from one of my new favorite blogs (this week's Friday Fave): Craftastical!

The kit I used is called A Hoot and a Half and I'm pretty sure I love everything about it. I just used a few of the elements, but here's a peak at the whole kit:
She's also got a ton more free digital scrapbooking kits here.

AND there's SO much more to her blog than freebie kits... She's a major crafter, and is currently updating a home they recently bought. I really look forward to the posts about her home makeover. I just love before and after pictures!

Craftastical is honestly one of my new favorite blogs, so I highly recommend it!

Read more...

Thrifty Finds: Neighborhood Garage Sale!

>> Monday, May 17, 2010

This post almost started like this:
THE DISASTER: I cannot find my camera cord....

And then, right after I typed that, I got up, walked right over to where the camera cord had most definitely been sitting the entire time I looked all over the house for it. "It's this brain of mine..it's got a mind of its own!" (If you can name that movie, I will think you are SO cool!)

Sorry, I realize this is a strange start to a post about garage saling, but it's my blog and I'll start the post how I want! :)
Anyway, you may or may not know that I am a thrifty girl. Yes, I did mention my Trying to Save a Buck Series (which *cough* has still yet to appear on this blog...), but my love for thrifty finds goes much beyond cheap groceries and meals.


I will admit I really enjoy shopping in thrift stores (GASP!). In fact, just this morning, when Bitty and I wanted to get out of the house, where did we go? Salvation Army. True story. It wasn't always this way... My mom and sister have been a thrifters for years, but in all honestly I use to think it was kind of gross. Maybe some of you can relate to that feeling.


Even when I was in college and single. I remember one particular incidence, where I was wearing a grey fleece Gap sweatshirt my mom had bought me at Goodwill. I was in front one of the groups of lab students I was TA-ing , and this cute girl said, "Oh, I have that same sweater in cream! It is SOOOOO OLD, but very comfortable!" (in her defense she was a very sweet girl, and didn't mean anything by the SOOOOO OLD part, except for the fact that she had gotten it several years previous).

And I just said, "Mmm-hmmmm...it is comfy" instead of "Yeah, it probably is old, but I wouldn't know, because my mom got mine at Goodwill." I loved that sweater by the way, and I still wear it in the winter.


Anyway, then I got married, graduated college, had a baby, started reading blogs, and started going to the thrift store for fun while my husband was at school or work, and the rest is history.

Oh my, this post is so long already! Can you tell I sort of struggle with finding the balance between making this blog personal enough to be interesting and succinct enough for people to read without falling asleep? I do. And this post is erring on the "personal" side. Oh well.

And finally: the purpose of this post: Garage Sale Finds!! I went out with my sister Caroline this weekend to her neighborhood garage sales and we had so much fun, and bought so much stuff! Here's the proof:

Here's our Nester-inspired view-from-the-trunk shot:


Caroline's loot:


She got so much stuff, all for under $30! The big highlight was that big brassy chandelier! She's been looking for new (cheap) lighting for her entryway for a year or two, and it was so worth the wait...that soon-to-be beauty was only $2!! I also love the giant candle sticks! If I wasn't already out of money by that time I may have fought her for them!

She also hit the jackpot with children's books (we found a sale of a former elementary teacher cleaning out her book stash!), some kids clothes and shoes, that big plastic storage thing, and other cute whatnots.

My Goodies:
I spent just over $20 on all of my finds combined. Most of the things I found were for my little boy. Here's the rundown (left to right):

tricycle: $3
green Gap tent (in the bag-like new): $5--a splurge, put away for his 2nd birthday this fall!
Scattergories: $1
Adobe Photoshop Elements 4.0 AND Premiere Elements 2.0: $2--I know those aren't the newest versions, but for $2 I'm okay with that!
dark red necklace: $1necklace display: $0.75--ya know... in case I decide to start selling jewelry...
toddler bed rail: $3 (saw one at the Salvation army today for $8!)
3 square hanging picture frames: $0.25
tension rod: $1
brown baby sandals: $0.50
toy cars: $0.10/each
toy dinosaurs: 3/$1small basket: $0.50
shower curtain hooks: $0.50
small hammer: $1 (I think...)
elephant flashlight (that makes an elephant noise when you turn it on!): $0.10toddler camp chair: $2

Ta-da! It was so fun.

What thrifty finds have you found lately??


Read more...

"Beauty and Motherhood are one..."

>> Sunday, May 9, 2010


I love this video. If you haven't seen it already you should watch it. It's about the blogger NieNie, and the things she's gone through and her wise perspective on life, including motherhood, so I thought it was perfect for today. One of my favorite parts is around minute 5, when she says "Beauty and motherhood are one; they're the same thing."

Happy Mother's Day! Love you!

Read more...

I want this.

>> Monday, April 19, 2010


Mmmmm...Avocado, anyone? Michael Miller Laminated Cotton Dandy Damask in Avocado, that is. I painted my dining room table black a while back (sorry, never got around to posting about it), but I think after we move this summer I want to paint the chairs black too, and recover the seats {again}.

And I think this fabric would be perfect! It's laminated, so we could wipe them off easily, which I think would be a great improvement. Not gonna lie, the fabric on the seats now is covered in unidentifiable spots. Liquids of some sort, mostly, and a little bit of dry erase marker from a recent incident.

What do you think? Would laminated fabric look too cheesy? I love the green damask either way.

Read more...

The easiest homemade cinnamon rolls I've ever made!

>> Monday, April 12, 2010


I love cinnamon rolls, but I've never been that great at making them. Sure, they've always turned out pretty good, but the process... not good.

Let's just say there have been tears shed over the making of cinnamon rolls at my house, and they were mine. I don't have a fancy mixer or anything, so I've always mixed them by hand, and ended up with sticky dough that stuck to everything when I was trying to roll it up. Kinda drove me crazy.

But last week one day, I was making scrambled eggs with ham for dinner, and just had the idea "I should see if I can find a cinnamon roll recipe that will work in the breadmaker.", you know...to beef up my breakfast for dinner. Well, I found one! So we ended up having breakfast for dinner/dessert!

I love using my bread machine to make pizza dough (because let's just face it, I don't love handling dough). It's so easy to throw the ingredients on and turn it on the dough cycle. Granted, you do have to do that step an hour in advance of when you might have started making it by hand, but to me it is SO worth it to have the bread machine do all the work. I don't know why I didn't think of doing cinnamon rolls in there sooner!

I found this recipe on Allrecipes.com.

The website calls them "Clone of a Cinnabon". I call them Delicious. And Easy. Or maybe... So Delicious and Easy That I've Already Made Them Twice in the Last Four Days. But whatever you choose to call them, I hope you try it and enjoy!

Ingredients

  • 1 cup warm milk (110 degrees F/45 degrees C)
  • 2 eggs, room temperature
  • 1/3 cup margarine, melted
  • 4 1/2 cups bread flour
  • 1 teaspoon salt
  • 1/2 cup white sugar
  • 2 1/2 teaspoons bread machine yeast

  • 1 cup brown sugar, packed
  • 2 1/2 tablespoons ground cinnamon
  • 1/3 cup butter, softened
**I just used the leftover portion of the stick of butter from the first part of the recipe, which ends up being less than 1/3 cup, but it is more than enough. I also didn't measure the cinnamon and sugar, i just sprinkled it on till it looked good.
  • 1 (3 ounce) package cream cheese, softened
  • 1/4 cup butter, softened
  • 1 1/2 cups confectioners' sugar
  • 1/2 teaspoon vanilla extract
  • 1/8 teaspoon salt
**I didn't have any cream cheese, so I just made some standard powdered sugar icing, and they were still delicious! Normally I'm all for cream cheese frosting, but you could easily save yourself the calories and they will still be so delicious!

Directions

  1. Place ingredients in the pan of the bread machine in the order recommended by the manufacturer. Select dough cycle; press Start.
  2. After the dough has doubled in size turn it out onto a lightly floured surface, cover and let rest for 10 minutes. In a small bowl, combine brown sugar and cinnamon.
  3. Roll dough into a 16x21 inch rectangle. Spread dough with 1/3 cup butter and sprinkle evenly with sugar/cinnamon mixture. Roll up dough and cut into 12 rolls. Place rolls in a lightly greased 9x13 inch baking pan. Cover and let rise until nearly doubled, about 30 minutes. Meanwhile, preheat oven to 400 degrees F (200 degrees C).
  4. Bake rolls in preheated oven until golden brown, about 15 minutes. While rolls are baking, beat together cream cheese, 1/4 cup butter, confectioners' sugar, vanilla extract and salt. Spread frosting on warm rolls before serving.

Read more...

Good News

>> Wednesday, March 31, 2010

  • I finally uploaded a ton of pictures off of my camera onto the computer, and realized I've taken lots of pictures of things to post on this blog! Woohoo! Now I just need to sit down and actually do it.

  • One of my excuses for being a bad blogger lately (sorry new followers!) IS good news... We know where we will be going for medical school next year, and are now in the process of looking for a HOUSE! (As I type that I hear one of those heavenly choruses singing "Aaahhhh" with a few tinkling chimes in the background. No joke.) But seriously, people, a house! I haven't minded living in an apartment too much. It's been 6 years now, how time flies! But my number one main reason for wanting to live in a house is so that Bitty can go outside and play in the yard whenever we want. I feel like he gets so bored in our apartment; and we have to be completely ready for the day and make a trip to the park or someone's house to let him play outside. I feel like a yard will be such a blessing! Not to mention it will be fun to have a house to decorate! Should make for lots of blogging material!

  • I'm thinking of starting a new series called Trying to Save a Buck...since that's what I've been doing even more lately. I've even got pictures taken of a few different things to write at least a couple of posts about. And I'm working on one more even as I type this! I'm making some burritos to freeze for my husband to take to for lunch. (The rice is on the stove cooking, in case you were wondering how I am blogging and making burritos simultaneously. :) It may be awhile before I get around to posting about this one though.

Read more...

Can you tell the difference?

Or am I the only crazy one? Let's find out! Look at the pictures below and see if you can tell the difference.

Here's what it looks like when my husband loads the dishwasher:


And when I do it:

What? You think both pictures look exactly the same? Well... I know, they do look pretty close, but they ARE different.

Does anyone else like to arrange the silverware by type when they load the dishwasher? I find it makes unloading the silverware so much faster. I guess it just bugs me having to put individual pieces away. This way I can just grab all of one type at once and dump them in the drawer.

Don't get me wrong, though... I L.O.V.E. when my husband does the dishes and I don't have to! {And it's only occasionally that I go behind him and rearrange the silverware!}

I know. I'm nuts. I really wish that this tidbit of OCD carried over to all aspects of cleaning my house. Alas, becoming a crazy cleaning woman is still on my list of things to do. Right after cleaning out my fridge and getting rid of the large quantity of cheerios my child dispersed throughout the car this weekend.

Do you have any crazy cleaning quirks?

Read more...

Mini Mantel Makeover

>> Monday, March 22, 2010

I meant to post this a week or two ago. Better late than never!

I posted about my renter's mantel here, and this is what it looked like after we got moved in and set it all up. I thought it was nice, but now it kinda looks like a bunch of stuff all lined up in a row across the mantle. But it worked.


I didn't take a picture of the mantle at Christmas, though it was lovely. Mini ornament wreaths around the candle sticks, garland, and a little white nativity in the middle.

Then....after Christmas... well I got lazy, I guess. I just kinda threw the other pictures and accessories up there and never really got around to arranging them...for a couple of months.

So this is sadly what my mantle looked like (or some variation of this) from the new year until just a couple of weeks ago. Sad, I know.

As they say, "clutter attracts clutter," so since it was in disarray already, I found myself sticking random things {that I wanted out of Bitty's reach} up there. Hence the headband, wedding announcement, and cover of yet another book my little boy destroyed.

Don't worry, I finally got sick of it, and did a little rearranging. I was going to look around and switch out a few items, but in the end I didn't.

With just about a minute's worth of rearranging, I ended up with this:

Ah, much better.

Here are a few other posts about decorating mantel's lately:

Lettered Cottage's Mantel Mania Part 1 and Part 2
Just a Girl's Spring Mantel


Makes me want to put something more springy up there!

Read more...

Thanks!

>> Saturday, March 13, 2010

I just wanted to say a quick "thank you" to everyone for commenting on and following my blog! It totally makes my day when I check my email and I see that I've got new comments to read! And when I see that I've got a new follower, it feels so good to know that someone likes what I'm doing! And emails are very wonderful too!

Anyway, thanks! We've got spring break this week, so I may kinda sporadic.

Have a great weekend!

Read more...

Friday Faves: Tumblr and Sock Monsters

>> Thursday, March 11, 2010

You may have noticed in my mess of a blog redesign, the tab above that says {FAM}tastic Idea File. It's pretty much my new favorite thing! I started a tumblr account and I LOVE it! It instantly blogs pictures, links, quotes, etc that you find online, automatically linking them up to where you found them! Easy peasy.

So if you click on that tab, you'll see what I've put on there so far... just random things I've seen that I've liked in the last few days. There's not much on there yet, but if you check it periodically, you may see something interesting!

And here's my other fave this week:

One of my friends from college (Hi Amanda!) just started a really cute craft blog called My Inspiration Index, and just posted her first craft tutorial (yesterday, I think) for these:

How cute are these sock monsters? I love them. And they are perfect for my goal of making homemade gifts this year! Pretty sure Bitty will be getting one this year! (And maybe a few other people, too...). Go check My Inspiration Index out for this tutorial and some other cute ideas!

Read more...

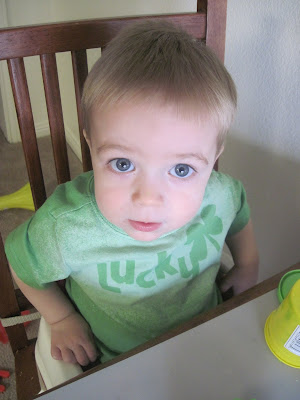
This is my lucky shirt!

>> Wednesday, March 10, 2010

A couple of weeks ago I was shopping at Walmart and saw these green t-shirts for $2 each, and I thought that for $2 I could make a St. Patrick's day shirt! I'm usually too cheap to buy a holiday shirt that's only going to to get worn a couple of times, but even I could handle $2!

So I picked up 3 and had my sister and sister-in-law come over so we could make shirts for our little boys. I knew I wanted to do one of the bleach stencil shirts, so we used this tutorial as a guide.

Here's how to do it:

Step 1: Cut out your letters, shapes, whatever you want to put on your shirt. We printed them off the computer onto cardstock. Figure out how you want to arrange them. This is how I did mine:


Step 2: Use spray adhesive to stick the letters onto your shirt. Mix some water and bleach in a spray bottle. I think we used about a 3:1 ratio (water:bleach). Spray it over the the part of the shirt where your letters are. Anywhere that you want bleached.

Note: Don't forget to put something inside the shirt so the bleach doesn't soak through to the back. We just put a plastic grocery sack inside.


Step 3: Once you see the bleach starting to work, rinse it out in running water. We used some dish soap too, since it was handy, then threw all of the shirts in the washer when they were all finished. We also peeled the letters off as we rinsed it in the sink.


Steps 4, 5, & 6: Wash, dry, and wear!

Super cute, eh? I love it! And it was super easy too. That's the best kind of project in my opinion!

We were thinking of maybe doing Easter ones with brown T-shirts and using the shape of a chocolate bunny for the stencil. How cute would it be if you used a scallop punch on your stencil to make it look like the chocolate bunny had a bite out of it!?

giveaways

Read more...

I'm lazy.

>> Monday, March 8, 2010

  • I've got several things to post about but have just been too lazy to get the camera cord out and download (or upload? which is it?) the pictures onto the computer. Look forward to a post about a super cute St. Patrick's Day project (hopefully tomorrow), a mini mantel makeover (say that 10 times fast), and proof that I might be a little bit crazy...

  • I still have yet to "Fling" anything for the challenge...yikes... Better get a move on. I keep thinking about getting rid of things, if that counts for anything. :)

  • Oh, and as you might have noticed, I started remodeling my blog...and along with all other projects that are unfortunate to find themselves in my hands, the poor thing's been sitting around half-finished and looking pitiful for a few days already. Sorry, if I was a real, professional blogger I'd have a grand reveal and the results would be spectacular and "ooooh" worthy. If you are kind enough to read this blog you are stuck with my apparent lack of web design experience and motivation, which will probably end in a mediocre result. Oh well, chalk it up to feeding, bathing, chasing, cleaning up after, diapering, re-diapering, re-diapering, re-diapering (it was an unfortunately poopy day today), and loving my sweet little boy.
Here's to hoping you're more productive than I am!

Read more...

Spring Flinging it.

>> Wednesday, March 3, 2010


Okay, I'm doing it. A blog I read linked to a great Spring Fling challenge, and I think I'm up for it.

The host is a blog called Life Frosting. I browsed a bit and it looks like she has some other interesting ideas on there as well, so check her out.

The challenge:
"Fling" 100 things in your house before the first day of Spring, March 21st.

How to Fling:
Throw away, donate, give away, re-gift, sell, etc. Get rid of it!

And I'll try to keep track of it all on my sidebar... Not sayin' I'll make it to 100... At first I didn't want to do it because I might not be able to complete it in time. Then I realized that that didn't really matter, because even if I didn't make it to 100, I'd still be getting rid of a bunch of junk. And since we're moving this summer, that is something I plan on doing anyway!

You should join me, it'll be fun!

Read more...

Hand-stamped goodness.

>> Tuesday, February 23, 2010

Thursday night Bitty and I spent the night at my sister's house while both of our husbands were out of town! That's always fun. We've done it a couple of times now, and it's fun to watch a totally girly movie and just hang out.

On Friday we decided to finally finish the necklace I made her for her birthday (and the one I made myself!) I got a set of metal alphabet stamps for Christmas, so we stamped some cute brass tags to go with the big turquoise beads and chunky chains.

Here we are sporting our cute necklaces. Pardon my unkempt appearance please!


Some close ups. On my sister's (the circle) I stamped the first initial of each of her children. We were careful, and marked with a pencil where we wanted each letter, etc.

With mine...um, I wasn't quite as careful...oops! Oh well, I guess it's just got more of a home-made "rustic" look to it :) It was the first time I've stamped a plus sign or equals sign, so it was kind a of trial and a lot of error. I like it anyway!


Friday night I ordered my fabric from Around the Block Quilters Shop, and it got here Monday morning! Talk about speedy! And look how great it looks in person!

I should order things online more often...it's so fun to get a package in the mail!

Read more...

Experimenting with Vegetable Purees

>> Tuesday, February 16, 2010

I've never really liked peas. Growing up I HATED them. I can eat them now, but I don't usually choose them. As legend has it, my mom would serve peas with dinner and I would not cooperate. I gagged when I tried to eat them. When my mom said no dessert if I didn't eat my peas, I would opt out of eating the dessert as a way to get out of eating the peas...I actually told her I'd just smell the dessert, instead of eating it, so that I didn't have to eat them. I know...weirdo. Anyway, as the story goes, my mom pulled a fast one on me one night by mixing spaghetti sauce and peas in the blender before serving it with our spaghetti. I was none the wiser. No idea I had just eaten peas. It worked!

Point being, this isn't a new trick. I think it gained a little popularity when Jessica Seinfeld put out her cookbook Deceptively Delicious, all about this very topic. I really think it's a great idea. I realized recently that I am great at making sure Bitty eats lots of fruit, but not as good with the veggies.

Purees currently in my freezer: 2 half cup bags of sweet potato, and 2 of cauliflower... and I have more veggies just waiting for a date with the blender!


So, a couple of weeks ago, remembering what my mom had done, and what I had read in Deceptively Delicious, I decided to throw about 2/3 cup of frozen peas and carrots (thawed) into the blender with some spaghetti sauce to serve over the chicken with cheese ravioli (kind of a mix of chicken parmesan and baked ravioli) I was making. Unfortunately the carrots turned the sauce kinda orange, but it was still pretty good!

So then on Monday, I was planning on making sweet and sour chicken with fried rice. I decided to try using some sweet potato puree instead of the egg you're supposed to wet the chicken in before covering in cornstarch and frying. It worked pretty well! I don't make sweet and sour chicken often, because it's more work than I usually put into dinner on a normal night, but I think next time I would like to add maybe a quarter cup of sweet potato puree to the sauce mixture too and see how it turns out.

Soooooo good!

The only other puree I've made and used before is cauliflower. It's been quite a while but I thought it worked well too. I used some in my cream soup/sour cream/chicken mixture in enchiladas once and was pretty good. My all time favorite use of puree so far was in lasagna. I mixed 1/2 cup of cauliflower puree in with the cottage cheese and made the lasagna as usual. SO GOOD. I'm all for a moist lasagna, and the addition of that puree made it perfect.

So now, I've got some spinach in the fridge that's a little too wilty for me to want to use it for a salad like we usually do. I was so excited that I don't need to let it go to waste, but I can puree it instead!

Have you ever cooked with veggie purees? Have any good recipes to share??

Read more...

Bitty quilt inspiration...

On my list of projects to do this year, is a twin-sized quilt for my little boy, that he can start using when he moves to a big boy bed.

I'm not planning on starting it until after we move this summer, because I have so many other projects to finish first (including 2 other quilts!). But, I have been keeping my eyes out for cute patterns and fabrics. I want something that will definitely look like a "boy" quilt. BUT I also want colors that I could find girly prints in, in case the next baby we have (no, I'm not pregnant!) is a girl and we needed them to share a room. I'm thinking ahead, ya know.

Which also brings me to...I don't want it to look extremely juvenile either. I mean, I've never finished a quilt yet, in my life...I would love to be great at it and make my kids lots of quilts, but just in case, I don't want the one I make this year to be something he outgrows too fast.

Anyway, I was browsing Cluck, Cluck, Sew the other day and found this really cute disappearing nine patch quilt made for a boy!


I think the disappearing nine patch in the center is so cute, and just "messy" enough to be a great pattern for a boy! So I'm thinking I'll do some version of this for his quilt! Cute, eh?

Now the question is should I buy the green or the blue Garden Party print (on sale at Around the Block Quilter's Shop this week!)?


Which do you like better??

Read more...

Post-Valentines Post

>> Monday, February 15, 2010

I hope everyone had a great Valentine's day! I didn't make a fancy Valentine dinner, but I did make some awesome PINK heart-shaped pancakes for breakfast! Not really very original, but so festive and fun! It may just be a new Valentine tradition for our family!

And this is what happens when you leave a plate unattended at our house...
I made my hubby a little coupon book for Valentine's Day (remember, one of my goals this year is to give homemade gifts!).

I was a little worried he'd think it was really dorky. But I'd totally forgotten that he said his mom used to give him coupon books for his birthday and he loved them! Phew! Turns out he really did like it.


Above is the cover I made for the book. I used a kit from shabbyprincess.com for all of the papers, and put it together with Scrapbook Factory Deluxe. Below is the coupon that he liked the best:

My husband got me this great clock for my present! I love it!

Our old clock pretty much stopped working after we moved here at the end of last summer. It would kind of work off and on, so it hung on our wall for months with the wrong time on it. Pretty gangster, I know.

I didn't really expect him to get me a clock, because I didn't think he'd want to pick it out himself. As you can see he did great. What's funny is that it actually looks just like our old clock, except the old one wasn't painted black. I guess he knew I'd like it, since I loved the old one so much, and we've got lots of black accessories in our living room! Well done, Dear!

My husband told his high school students what he was getting me, and they thought it was pretty boring, but I LOVE it! I told him that I'll hold it on my lap in the car when we move this summer so it doesn't get broken. He thought that was a little extreme, but I just may do it!

Read more...

  © Blogger template Simple n' Sweet by Ourblogtemplates.com 2009

Back to TOP